Powered by Blogger.
Showing posts with label recovery. Show all posts

How to Restore a System

You’ve just installed a new program, but before you can start using it, Windows decides to give up the ghost. Now what? System Restore is a powerful tool that allows you to revert Windows to a recent point when everything was working fine. It will undo any changes to the registry and settings, and will uninstall any programs that were installed since the point was created. You can perform a System Restore from within Windows, or even if you can’t get Windows to start. Read on after the jump to find out more.

Also See.. 


How To Access System Restore from Advanced Startup Windows 8


Method :  
1. Open the System Restore tool. The System Restore tool can restore your computer to any of the available restore points. Any settings, installations, and other changes that occurred between the restore point and the present will be rolled back, but your files will not be affected. This means that while System Restore can quickly fix problems with programs and settings, it cannot be used to retrieve documents and files. Accessing System Restore is slightly different for different versions of Windows, but the tool is the same:
  • Windows 8 – Open the Start screen and type “recovery”. Select “Recovery” from the list of search results. This will open the Recovery window. From there, click the “Open System Restore” link.
  • Windows 7 and Vista – Click Start and type “restore” into the Search box. Select “System Restore” from the top of the search results list.
  • Windows XP – Click Start and then select All Programs → Accessories → System Tools. Click on System Restore.

2. Choose your restore point.
Windows will automatically select the most recent restore point in which something was installed or changed. The change will be displayed underneath the date the point was created. If you want to select a different point, click the bottom option and click Next. You will be provided a list of available points with a short description of what occurred to create the restore point. The number of points available will depend on your restore point creation settings.

  • For more details about what will be affected by the restore, select a point from the list and click the “Scan for affected programs” button. This will open a window which will display all of the currently-installed programs and drivers that will be deleted currently-uninstalled programs and drivers that will be restored by this restore point.
  • Check the “Show more restore points” box to display points that Windows thinks are less useful.
  • The interface for Windows XP is different than Vista-8. You will need to manually choose which restore point to use from a calendar interface. Each point will have a short description as to why it was created.[1]

3. Confirm that you want to restore. When you select your point, you will be given one more chance to ensure that you want to proceed. Review the point you selected and click the “Finish” button and then “Yes” to start the restore.   


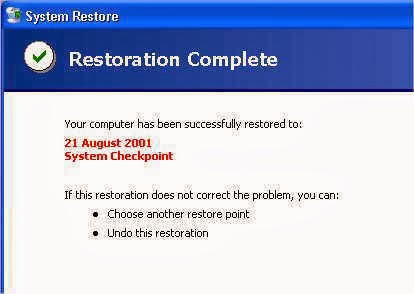
4. Wait for the restore to complete. Your system will reboot and the restore process will begin. Be patient, as the restore process can take a while to complete. Once the restore is finished, Windows will load and you will be shown a message confirming that the restore was successful. 


5. Test the restore. Once the restore is complete, you can go back to using Windows as you normally would. Check to see if the problems you were encountering still occur. If you want to use restored programs, you will most likely need to reinstall them.


Warnings
  • System Restore will not recover deleted files or documents, and is not a substitute for a backup system.

 Also See..


How To Restore a System Using Command Prompt


How To Restore a System Using Command Prompt

You’ve just installed a new program, but before you can start using it, Windows decides to give up the ghost.Now what? System Restore is a powerful tool that allows you to revert Windows to a recent point when     everything was working fine.It will undo any changes to the registry and settings, and will uninstall any programs that were installed since the point was created. You can perform a System Restore from within Windows, or even if you can’t get Windows to start. Read on after the jump to find out more.


Also See ...   How to Restore a System

Method: 

1. Open the command prompt. Reboot your computer and load the Advanced Startup menu. You can access this by pressing the F8 key as your computer boots up. Select “Safe Mode with Command Prompt” from the list of options. You will be taken to a DOS-style command prompt.
  • For more details on starting in Safe Mode, see this article.
  • This method is for Windows 7, Vista, and XP. Windows 8 users should refer to the next section.
  • If you can’t access the Advanced Startup menu, insert your installation disc and boot from it. Select “Repair your computer” and then select “System Restore”.

2. Start System Restore. Once you are at the command prompt, you will need to start the System Restore program. The command is slightly different depending on your operating system:
  • Windows 7 and Vista – Type rstui.exe and press Enter.[2]
  • Windows XP – Type %systemroot%\system32\restore\rstrui.exe and press Enter.[3]
  
3. Choose your restore point. You will be presented with a list of available restore points, sorted by date. There will be a short description of what the change was that caused the point to be created. Select the point to start the restore process.
  • Restoring from the command prompt is irreversible, as no Undo restore point will be created. You can always restore to a different point.

 4. Wait for the restore process to complete. The restore process can take quite and while to finish. Once it is complete, your system will be rebooted and you will be returned to Windows. A message will be displayed confirming that the restore was successful.
  • If you changed your boot options to load Safe Mode, you will need to change them back so that you load into Windows regularly.

 5. Test the restore. Once the restore is complete, you can go back to using Windows as you normally would. Check to see if the problems you were encountering still occur. If you want to use restored programs, you will most likely need to reinstall them. 


 Warnings
  • System Restore will not recover deleted files or documents, and is not a substitute for a backup system.

Also See....

How To Access System Restore from Advanced Startup Windows 8


How to Access a Damaged Hard Drive ( Hardware Problems)

 The biggest loss when a hard drive is damaged is usually not the breakdown of the hardware but the inability to access saved data or complete data
deletion. However, all hope is not lost because there are many tricks and tips that you can apply to try to
access a damaged hard drive.                                        

Method (HARDWARE PROBLEMS)

1. Listen carefully for any noises coming from your hard drive especially when you try to access it. If you hear a repetitive clunking when you try to access saved data it means that the head is having difficulty in reading stored information. In terms of physical damage, it means that either the arm or disk inside your hard drive is broken. At this point you may want to consider hiring a data recovery professional because the intricacies of opening a hard drive are very complex.

2. Do a detection test by reinstalling your hard drive and then restarting your computer to see if the hard drive is detected. If your hard drive is not even being detected there may be a problem with the board or access ports. If the problem is with an external hard drive, you can try to replace the access ports by shifting the hard drive into a new enclosure. If the problem is with your hard drive board you will have to replace the board. Use the methods suggested for your specific hard drive model to locate and replace the board. Make sure the new board is compatible with your hard drive.

3. Freeze your hard drive in a zip-lock bag if all other methods have failed. This may enable you to access a damaged hard drive for a very short amount of time, so connect the hard drive to your computer as quickly as you can after it has been frozen to transfer files to a safe location. Be aware that freezing a hard drive can cause further data deletion.

Also See For        SOFTWARE PROBLEMS


To Watch Online Video Click Here...........   How To Access Damaged Hard Drive

Tips

As a possible quick fix, simply disconnect your hard drive and connect it to another computer. You may discover that you have a problem in your computer or its operating system instead of a broken hard drive.

Warnings

Never open a hard drive unless it is in a controlled dust-free environment. Exposure to dust can cause severe permanent damage.

How to Access a Damaged Hard Drive (Software Problems)

The biggest loss when a hard drive is damaged          is usually not the breakdown of the hardware 
but the inability to access saved data or complete 
data deletion. However, all hope is not lost 
because there are many tricks and tips that you can
 apply to try to access a damaged hard drive.

Method  (Software Malfunctions)  

1. Look for clues that indicate that you have corrupted files. For example, your computer may detect your broken hard drive but not let you access the data that was saved on it. At times, you may even see file names and icons appear but the files will not open. All of these hints suggest that you have a software malfunction.

2. Run any rescue and recovery software that came with your hard drive. Many hard drives come with built-in software that allows you to store files more efficiently. However, a virus or other glitch in the software of the hard drive can make saved data inaccessible even though your hard drive has not suffered from any physical damage. The rescue and recovery program will try to fix the built-in software.

3. Use other programs to try to rescue files if the original rescue and recovery program that came with your hard drive does not work. You can try using programs such as Recover My Files.

4. Access the Microsoft Rescue and Recovery utility if you are using a computer with the Windows operating system. You can find the Rescue and Recovery utility wizard by going to "Start" and then clicking on "Search" to search for the utility.

Also See For          HARDWARE PROBLEMS


To Watck Online Video Click Here.....  How TO Access Damaged Hard Drive

Tips

As a possible quick fix, simply disconnect your hard drive and connect it to another computer. You may discover that you have a problem in your computer or its operating system instead of a broken hard drive.

Warnings

Never open a hard drive unless it is in a controlled dust-free environment. Exposure to dust can cause severe permanent damage.

How to Repair Bad Sectors in Macintosh OS X

As of September 2011, OS X is the second-most-active general-purpose client operating system in use on the World Wide Web, (after Microsoft Windows), with an 8.45% usage share according to
 statistics compiled by W3Counter It is the most successful Unix-like desktop operating system on the web, estimated at over 5 times the usage of Linux


STEPS TO REMOVE BAD SECTOR

1. Insert the Macintosh (Mac) installation disc into the disc drive. The Mac OS X installation disc was initially included with the contents of your computer.

2. Select the "Install Mac OS X" option from your desktop. After your computer reads the installation disc, the "Install" option will appear in the form of an icon.

3. Perform the installation process. An installation wizard will appear on your screen to walk you through each step of the process. You will be prompted to indicate the affected disk drive that contains the bad sectors, as well as the parts of the operating system you want re-installed.

  •    Click "Install" after following the prompts within the installation wizard to re-install the affected parts of your Mac OS X system.

Also See For          WINDOWS 7 and WINDOWS XP


   To  Watch Online Video Click Here......... How To Repair Bad Sector


How to Repair Bad Sectors in windows

Repair Bad Sectors                            

Windows 7 and Windows XP 
Bad sectors are sections of your computer's hard drive that have been damaged, and have lost the ability to save and store your data. In most cases, bad sectors are the result of internal physical damage in your computer, such as magnetic disk failure, and can sometimes corrupt your saved data. Bad sectors are usually indicated by grinding or chugging noises inside of your computer or from error messages that inform you that data cannot be saved to your disk drive. To repair bad sectors on a Windows operating system, you can run your computer through an automatic error-check and repair process. If you have a Macintosh computer, you can re-install the affected sections of your operating system (OS) that contains the bad sectors, or you can choose to re-install the entire OS completely.

Method : Windows 7 and Windows XP

1. Close any open files on the affected disk drive. In order for the repair process to work, you must close any programs, applications, and files saved or stored on the faulty disk drive.


2. Open your Start menu. The Start menu button is located in the bottom-left corner of your Windows desktop and may appear in the form of the Windows logo if you use Windows 7.


3. Select "Computer" from the Start menu. If you use Windows XP, this option may read as "My Computer."


4. Open the properties menu for the affected disk drive. The "Computer" folder will display a list of all your disk drives on the computer.
Right-click on the affected disk drive and choose "Properties" from the floating menu that appears. The properties menu will then appear on your screen.


5. Click on the "Tools" tab. This tab will allow you to access the error-check and repair option.


6. Click on the "Check now" button. You will then be presented with options for checking and repairing existing problems with your disk drive.


7. Select the option for repairing bad sectors.
Place a check mark within the box next to "Scan for and attempt recovery of bad sectors."


8. Repair the bad sectors.
Click on the "Start" button to repair the bad sectors on the affected disk drive. This procedure may take several minutes, depending on the size of the disk drive you are repairing. When the repair process has finished, Windows will notify you that the bad sectors have been repaired.


Also See For         MACINTOSH OS X


To Watch Online Video Click Here........  How To Repair Bad Sector

Tips

If you use Windows XP, and prefer to use the command prompt to repair bad sectors, click on "Run" from the Start menu, type "cmd," then press the Enter button on your keyboard. You can then type the command of "chkdsk volume:/r" to locate and repair existing bad sectors.

How to Reset Administrator Password through Guest Account?

Hie...Friends. Here is a Best Trick and                                                          
 rarely known trick to
Reset the Administrators Password through the
Guest Account without Knowing it...

Yes,Its any easy one and its not even an Hack it a Tweak or a bug which Windows uses to Reset the Password if the Administrator Forgets it...

So ,lets come back on how to perform this trick..

It works on all windows XP and i didnt try it on other operating systems...


Follow these steps carefully :

1)Firstly log into the Guest Account of the system

2)Then Right click on the My Computer icon and select Manage.

3)On the left sidebar you will find Local users and Groups ,click on it and then select users.

4)Then in the main panel you will see administrator.

5)Right Click on Administrator and click set password.

6)Set the password and Hit Enter and Enjoy

Thats it now restart your system and log into the Admin account using the password you Set..

Repairing corrupted files in Excel

APPLIES TO                              

Microsoft Office Excel 2003
Microsoft Excel 2002

Microsoft Excel provides automatic recovery for a corrupted file by attempting to reopen and simultaneously repair the file. Excel identifies what it changed while repairing the file. If the repair fails, Excel again tries to open the file but instead of attempting a repair, Excel extracts cell values and formulas leaving only the data. Under some circumstances, however, Excel won't automatically go into recovery mode, so users may find it necessary to recover file data manually.

To manually repair a file

1. On the File menu, click Open.
2. In the Open dialog box, select the file you want to open, and click the arrow next to the Open button.
3. Click Open and Repair, and then choose which method you want to use to recover your workbook.

Methods for recovering data from damaged workbooks
The following are additional methods you can use to recover data manually from a file that has been corrupted. Under some circumstances a disk error or network error may make it impossible to open a file. In those situations you should move your file to a different hard disk drive or from the network to a local disk before spending time implementing the recovery options outlined here.

The following methods are opportunities to save data that might otherwise be lost, so if one method is not successful, try another. You can also try third-party software solutions to recover file data if you can't recover your data using these methods.

If you can open the file in Excel

HideUse the Revert To Saved Document command

If you are editing a Microsoft Excel worksheet and the file becomes corrupted before you have saved changes to the file, you can recover the original worksheet by doing the following:

1. On the File menu, click Open and select the name of the file that you are editing.
A dialog box appears with the message "Revert to Saved Document?"

2. Click OK. The file you are editing reverts to the last saved version of the file.
HideSave the file in SYLK format

Saving the file in SYLK 

format is typically used to remove printer corruption. If you can open the corrupted Microsoft Excel file, you can "filter" it if you save it in SYLK format, close the file, and then reopen it as follows:

1. On the File menu, click Save As.
2. In the Save as type list, click SYLK (Symbolic Link), and then click Save.

 NOTE   Only the active sheet in the workbook is saved when you use the SYLK file format. Click OK when the message tells you the selected file type does not support workbooks. Click Yes when the message tells you the file may contain features that aren't compatible with the SYLK format.

3. On the File menu, click Close.
4. On the File menu, click Open.
5. Select the .slk file you saved, and click Open.

 NOTE   To see the .slk file, you may need to click All Files in the Files of type list.

6. On the File menu, click Save As.
7. In the Save as type box, click Microsoft Excel Workbook, and then click Save.

 NOTE   Because this format saves only the active worksheet, you must open the corrupted file repeatedly and save each worksheet separately.

Save the file in Hypertext Markup Language (HTML) format

If you can open the corrupted Microsoft Excel file, you can "filter" it if you save it in HTML format, close the file, and then reopen it as follows:

1. On the File menu, click Save As. In the Save as type list, click Web Page (*.htm, *.html).
2. Under Save, click Entire Workbook, and then click Save.
3. Close the file.
4. Open the file again in Excel.
5. On the File menu, click Save As. In the Save as type list, click Microsoft Excel Workbook. Change the name of the file to create a new "filtered" copy without replacing the original.

 NOTE   Some features may be lost when you save in HTML format.

If you can't open the file in Excel
HideSet the recalculation option in Excel to manual

Start Excel and open a blank workbook if one is not open on the screen.
1. On the Tools menu, click Options.
2. Click the Calculation tab.
3. In the Calculation section, click Manual, and then click OK.
4. On the File menu, click Open and try to open the file.
5. Hide Use external references to link to the corrupted file

This method retrieves only data and not formulas or values from the workbook.

On the File menu, click Open. Then, browse from the current folder to the folder that contains the damaged file, and click Cancel.

Click New on the File menu, click File, and then click OK.
Type =File Name!A1 in cell A1 of the new workbook, where File Name is the name of the damaged workbook. If the Select Sheet dialog box appears, select the appropriate sheet, and click OK.
Select cell A1, and on the Edit menu, click Edit. Then, select an area that is approximately the same size as the range of cells that contain data in the damaged file, and then click Paste on the Edit menu.
With the range of cells still selected, click Copy on the Edit menu.
On the Edit menu, click Paste Special, select Values, and click OK.
This step removes the links to the damaged file and leaves only the data.

Open the file in Microsoft Word or WordPad

If you have the Microsoft Excel converter installed, you might be able to open your Excel workbook in Microsoft Word. If the file does open in Word, you will not be able to recover module sheets, dialog sheets, chart sheets, macro sheets, or any embedded charts. Also, you will not recover any cell formulas, only the results of those formulas that are currently in the cells.

You can also open your Excel workbook in WordPad. If the file does open, you might recover Microsoft Visual Basic code in your modules and class modules. Search for the words "Sub" or "Function" to find your code.

Open the file in Microsoft Excel Viewer


HideIf a chart is linked to the corrupted file, use a macro to extract the data

1. Enter the following macro code in a module sheet:

 Sub GetChartValues97() 
 Dim NumberOfRows As Integer 
 Dim X As Object 
 Counter = 2 

 ' Calculate the number of rows of data. 
 NumberOfRows = UBound(ActiveChart.SeriesCollection(1).Values) 

 Worksheets("ChartData").Cells(1, 1) = "X Values" 

 ' Write x-axis values to worksheet. 
 With Worksheets("ChartData") 
 .Range(.Cells(2, 1), _ 
 .Cells(NumberOfRows + 1, 1)) = _ 
 Application.Transpose(ActiveChart.SeriesCollection(1).XValues) 
 End With 

 ' Loop through all series in the chart and write their values to 


 ' the worksheet. 
 For Each X In ActiveChart.SeriesCollection 
 Worksheets("ChartData").Cells(1, Counter) = X.Name 

 With Worksheets("ChartData") 
 .Range(.Cells(2, Counter), _ 
 .Cells(NumberOfRows + 1, Counter)) = _ 
 Application.Transpose(X.Values) 
 End With 

 Counter = Counter + 1 
 Next 

 End Sub
Insert a new worksheet into your workbook and rename it ChartData.
Select the chart from which you want to extract the underlying data values.

NOTE   The chart can either be embedded on a worksheet or on a separate chart sheet.

Run the GetChartValues97 macro.
The data from the chart will be placed in the ChartData worksheet.

Saving a backup copy of your file

As a preventative measure, you may want to save your file often and create a backup copy every time you save. In the Save As dialog box (File menu, Save As command), click Tools, click General Options, and then select the Always create backup check box. This way, you'll have access to a good copy of the file, should the original be accidentally deleted or become corrupted.

You can also make sure that Excel automatically creates a recovery file at specific intervals. In the Options dialog box (Tools menu, Options command), on the Save tab, select the Save AutoRecover info every check box, and then specify a number of minutes. In the AutoRecover save location box, specify the location where you want to save the recovery file. Make sure that the Disable AutoRecover check box (under Workbook options) is not selected.

More information
For more information about file recovery issues, see the product support articles listed under See Also, or go directly to the Excel 2003 Support Center.
How to Break the Admin Password in Windows 7

If you forgot your windows 7 password and not interested in reinstalling Windows 7, try this method to break that password. Just remember to do this at your own risk.


Steps


     1.Get a bootable Ubuntu OS CD or DVD or a USB flash drive. If you dont have it, you can download it from www.ubuntu.com and burn it to a CD or DVD or copy it on a USB flash drive by using UNetbootin software.This tool is available in several websites.
  
  2.Boot the OS from CD or DVD or USB flash drive. If it doesn't boot, then you may have to change the boot order from your BIOS.
  

3.Don't install Ubuntu, instead choose Try Ubuntu without installing. Now the Ubuntu OS gets loaded.
  

 4.Look for the desktop when the OS has completed booting. In the left side of the desktop, you'll see a list of icons.You can find a folder icon on that list. Click on that icon.
  

5.Click on Windows folder in the C: drive (you may have installed it on a different drive; if so, go to that respective drive). Then click on the System32. In the System32 folder point to Magnify.exe and rename it as cmd.exe and rename the actual cmd.exe into Magnify.exe
   6.Restart your system and boot into Windows. Don't forget to remove the Ubuntu installation CD or USB drive before booting. Now at the log-on screen press the ease of access button at the lower left corner and check the 'Make items on the screen larger (Magnifier)' checkbox and click apply. Now you will be provided with a command prompt window.
   

7.Type "net user" (without quotes) into the window and press enter.
        This will list out the users in the system.


 8.Next type "net user x Microsoft" (without quotes) (here : "x" represents the username whose password is to be removed,so replace "x" with the corresponding username) and press enter. For example: net user anuj Microsoft
   

9.Close the command prompt window. Click that user name and type Microsoft in place of password and press enter.
   
10.Log in to your Windows account with this password. But don't forget to change your password.
   
11. Rename those two (magnify.exe and cmd.exe) back to their original names using Ubuntu.

How to Crack Windows Passwords With Ophcrack

Edited by Razorlight, Rockmonkey4004, Brett, Maluniu and 16 others
Cracking a Windows Password with Ophcrack with the use of rainbow tables, relatively easy if you take the right steps and if the computer can boot from a disc. The free, open source Ophcrack Live CD is a Windows account password cracking tool designed to help you recover lost Windows passwords. Whether you need to recover the lost password to a Windows account, you're looking to ensure that your passwords are secure, or you're a super l33t h4x0r, the Ophcrack Live CD is a pretty useful tool. The Ophcrack Project has recently released a Linux Live-CD based on SLAX that can be used to retrieve and crack passwords from Windows machines with little or no effort.

Ad

Edit Steps

  1. 1
    Go to The Ophcrack Website and download the ophcracklivecd iso that is offered there (~455 MB).
    Ad
  2. 2
    Burn the iso file to CD using an image burning software.
  3. 3
    Put the CD in the disc drive of the computer you want to crack the passwords of.
  4. 4
    Boot from disc. This shouldn't be to hard. Depending on computer, enter the bios settings and change the boot settings to boot from a disc drive on first boot device.
  5. 5
    Exit BIOS setting.
  6. 6
    Ophcrack will initiate by itself.
  7. 7
    The logo screen should appear, at which you should hit enter. Text should scroll down the screen, and eventually you will have a graphical interface pop up, with the one and only window (Ophcrack).
  8. 8
    Once the system is done, select the user account you wish to recover the password for, and click launch.
  9. 9
    Depending on the speed of your system, the cracker will go to work, and if it can determine and decrypt your password, it will eventually display it in the "NTPassword" column

HOW TO HACK WINDOWS 8


       News original from article on Oct, 10, Bill Gates whacked out a cool $100,000 for a Londoner who figured out how to hack into Windows 8. "Congratulations and well done," wrote Microsoft senior security strategist Katie Moussoris in a public blog to James Forshaw, a computer vulnerability researcher

HACK WINDOWS 8

Write the first paragraph of your page fghere.


As it happens, Microsoft has been offering rewards to those able to find security holes in its key systems for around four months.
The idea is to get bounty-chasing tech experts to expose any flaws before malicious hackers do so.
Microsoft has previously paid out $28,000 to users who found holes in Internet Explorer 11. There are still numerous prizes up for grabs.
"The reason we pay so much more for a new attack technique versus for an individual bug is that learning about new mitigation bypass techniques helps us develop defenses against entire classes of attack," Moussoris explained in the blog.
"This knowledge helps us make individual vulnerabilities less useful when attackers try to use them against customers." When we strengthen the platform-wide mitigation, we make it harder to exploit bugs in all software that runs on our platform, not just Microsoft applications.”
Paying out to the Londoner who hacked Windows 8 is really generous! While, during our usual usage of Windows OS, we users often set account (admin included) on our computer for security. It is pity that we often forgot such account password and can’t login laptop based on Windows 8. Then how to hack Windows 8 password?
There are many ways we can have a try. Such as:
Solution 1, hack Windows 8 password by re-installation or factory restore. This will make data lost.
Solution 2, hack Windows 8 login password from safe mode. If we have other administrator account to login computer, this method will be convenient!
Solution 3, hack Windows 8 password with a password reset disk. It will be prompted when can’t login pc with incorrect password. Also, please note that the disk can only be used if we created it before password forgotten.
Solution 4, well, we also can hack Windows 8 password by creating a password reset disk after password lost. At this time, we have to refer to pro Windows 8 Password Hacker Tool. Follow steps below to hack Windows 8 admin password:
Step 1, Download Windows 8 Password Hacker and install it on an available pc.
Step 2, Run the tool, insert a blank CD/DVD/USB into the accessible computer’s port. Create a Windows 8 password reset disk by following the tool prompts.
Step 3, Set BIOS for locked Windows 8 computer. Then insert the created password reset disk into the locked pc and start pc from disk chosen to reset or remove Windows 8 user account password.
Step 4, Restart Win 8 computer and login with password reset.
So, it is not hard to hack Windows 8 login password with pro Windows 8 Password Hacker. Learn more about this tool, you may need it one day if lose login password on Windows 8/7/Vista/XP!

Hiren's Boot CD


It is best for undetectable hard disk and also when you are unable to format the HDD.and many more problems which are given below.Hiren's BootCD[1] (also known as HBCD) is a bootable software CD containing a number of diagnostic programs such as partitioning agents, system performance benchmarks, disk cloning and imaging tools, data recovery tools, MBR tools, BIOS tools, and many others for fixing various computer problems. HBCD can be considered a valuable tool[2] for use in troubleshooting and recovery of computers.

As it is bootable, the operating system of the computer need not be available for the tools to be usable. All that is required is that the computer is able to run Microsoft Windows and Linux (but it does not have to have either of these installed at the time of use). Most of the tools are also available when the operating system is already started.

Contents

    1 Distribution
    2 History
     2.1 Licensing issues
    3 See also
Distribution

Hiren's BootCD [3] is available as an ISO image zipped together with other information such as its changelog. The image file can be burned to a CD or onto a USB flash drive for use on computers that support booting from USB.
History

Hiren's BootCD, created by "Hiren" & "Pankaj", is based on Knoppix and a collection of other freeware tools. It has found some controversial stigma as a "hacker" tool violating copyright. However, today the majority of its software is freeware or shareware.
Licensing issues

Prior to version 11.0, Hiren's BootCD contained a significant number of commercial products. In version 10.6,[4] no fewer than 17 were listed in the release notes. Most notably Acronis True Image, Norton Ghost, Acronis Disk Director, and Paragon Partition Manager. (Partition Magic Pro had been replaced already in version 10.5.) To be able to start a commercial application, the user had to promise to be the holder of a license, but no validation of this statement was ever made.

In version 11.0,[5] only three remained:

    Mini Windows 98
    Mini Windows XP
    A collection of MS-DOS utilities

In later revisions, Mini Windows 98 was removed, leaving only two commercial products on the CD.
See also

    List of bootable data recovery software
    Live CD
    Live USB
    Windows To Go.