How to Restore a System
 You’ve just installed a new program, but before you can start using it, Windows decides to give up the ghost. Now what? System Restore is a powerful tool that allows you to revert Windows to a recent point when everything was working fine. It will undo any changes to the registry and settings, and will uninstall any programs that were installed since the point was created. You can perform a System Restore from within Windows, or even if you can’t get Windows to start. Read on after the jump to find out more.
Also See..
How To Access System Restore from Advanced Startup Windows 8
Method :
1. Open the System Restore tool. The System Restore tool can restore your computer to any of the available restore points. Any settings, installations, and other changes that occurred between the restore point and the present will be rolled back, but your files will not be affected. This means that while System Restore can quickly fix problems with programs and settings, it cannot be used to retrieve documents and files. Accessing System Restore is slightly different for different versions of Windows, but the tool is the same:
- Windows 8 – Open the Start screen and type “recovery”. Select “Recovery” from the list of search results. This will open the Recovery window. From there, click the “Open System Restore” link.
- Windows 7 and Vista – Click Start and type “restore” into the Search box. Select “System Restore” from the top of the search results list.
- Windows XP – Click Start and then select All Programs → Accessories → System Tools. Click on System Restore.
2. Choose your restore point. Windows will automatically select the most recent restore point in which something was installed or changed. The change will be displayed underneath the date the point was created. If you want to select a different point, click the bottom option and click Next. You will be provided a list of available points with a short description of what occurred to create the restore point. The number of points available will depend on your restore point creation settings.
- For more details about what will be affected by the restore, select a point from the list and click the “Scan for affected programs” button. This will open a window which will display all of the currently-installed programs and drivers that will be deleted currently-uninstalled programs and drivers that will be restored by this restore point.
- Check the “Show more restore points” box to display points that Windows thinks are less useful.
- The interface for Windows XP is different than Vista-8. You will need to manually choose which restore point to use from a calendar interface. Each point will have a short description as to why it was created.[1]
3. Confirm that you want to restore. When you select your point, you will be given one more chance to ensure that you want to proceed. Review the point you selected and click the “Finish” button and then “Yes” to start the restore.
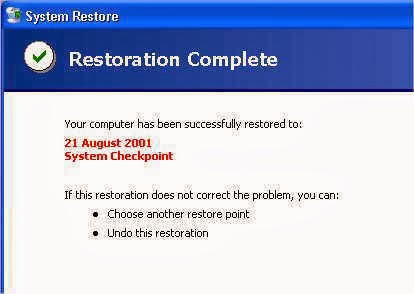
4. Wait for the restore to complete. Your system will reboot and the restore process will begin. Be patient, as the restore process can take a while to complete. Once the restore is finished, Windows will load and you will be shown a message confirming that the restore was successful.
5. Test the restore. Once the restore is complete, you can go back to using Windows as you normally would. Check to see if the problems you were encountering still occur. If you want to use restored programs, you will most likely need to reinstall them.
Warnings
- System Restore will not recover deleted files or documents, and is not a substitute for a backup system.
Also See..


This professional hacker is absolutely reliable and I strongly recommend him for any type of hack you require. I know this because I have hired him severally for various hacks and he has never disappointed me nor any of my friends who have hired him too, he can help you with any of the following hacks:
ReplyDelete-Phone hacks (remotely)
-Credit repair
-Bitcoin recovery (any cryptocurrency)
-Make money from home (USA only)
-Social media hacks
-Website hacks
-Erase criminal records (USA & Canada only)
-Grade change
-funds recovery
Email: onlineghosthacker247@ gmail .com