How to Start Pictures in Adobe Photoshop
 Photoshop is a graphics editing program by Adobe that is used by professionals and regular consumers. It is usable on a variety of operating systems and is available in a variety of languages. This program can be used to create images from scratch or to alter existing images. Photoshop skills are useful and can lead to gainful employment. You can get a degree or take classes in the use of Photoshop or you can teach yourself to use the program using this and other tutorials.
Method :

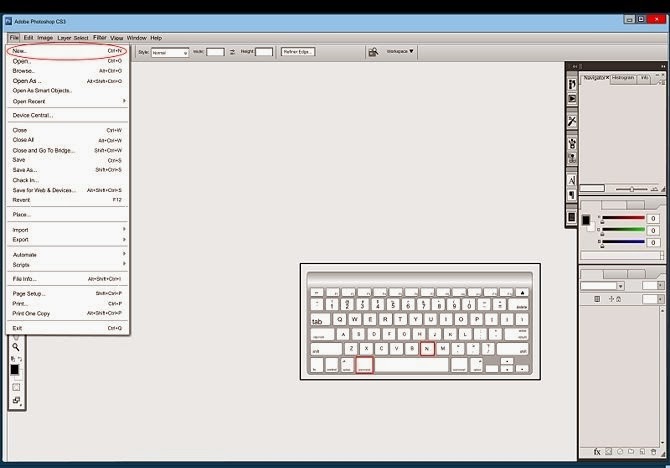
- Start your file. Once the program has started, you will need to open a new file in order to create an image. This can be done by clicking the main menu button and selecting “New”, or pressing “control/command N”.
- Now you will be presented with a variety of options. This will allow you to customize your starting canvas. Don’t worry, however, as most of these options can be changed even after you have begun working on the file. Just be aware that changing certain options after beginning work will affect the image and need to be compensated for.
- Choose your dimensions. The first several options are for setting the dimensions of your canvas or work area. You can use a preset size (such as 8.5x11” if you want to make something to print on normal paper), a custom size (using the height and width controls), or choose the clipboard option (which will set the canvas size to the dimensions of whatever is currently in your computer’s clipboard, useful for pasting and editing existing images).
- Choose your resolution. You will want to set your resolution for the image, based on what you intend to do with it. The resolution determines how many pixels will be in one square inch of the image. The more pixels in an inch, the more detailed the image will be.
- A higher number of pixels/inch will also result in a larger file. This will have various consequences. Larger files will require more processing power from your computer and may cause it to freeze or lag if your system isn’t powerful enough. Larger files will also take longer to download or upload and should only be put on the web as necessary.
- Standard web resolution is about 72 pixel/inch. Standard print resolution is about 300 pixel/inch. You can set your resolution however you want, but be aware that using a resolution less than 300 for print will make your image look pixelly. Using a resolution above 72 on the web will make your images take longer to download.
- Choose your color mode. Depending on what your image is for, you will need to change the color mode. This determines how the colors will be calculated and displayed. This is one setting which can be changed after the image has been created without too much consequence. [1]
- RGB is the standard color mode. This is appropriate for images which will be viewed on a computer, as this is the method computers use to calculate and display images.
- CMYK is another common color mode. This is the mode best used for images which will be printed, as this is the method used by printers in order to render colors. It will probably be best to create your image in RGB first and then convert it to CMYK before printing, since your computer will automatically display RGB colors.
- Grayscale is the third most common option and is pretty much exactly what it sounds like. It is really only useful for creating images which will be printed in grayscale.
- With any color mode, the higher the number of bits, the more colors will be able to be displayed. Increasing the bits will also increase the file size, so only use a higher number if absolutely necessary.
- Choose your background. This will mainly determine if your starting canvas is white or transparent. A white canvas will make it easier to see what you are doing but a transparent one will make most effects easier to achieve.
- The best option would be to create all of your images on layers above the background, since this will make it so that you can switch back and forth between white and transparent fairly easily.
- Start with a transparent background, which you then color white. Create every other image on separate layers above the background. Erasing the white as necessary will allow you to have the best of both worlds.


This professional hacker is absolutely reliable and I strongly recommend him for any type of hack you require. I know this because I have hired him severally for various hacks and he has never disappointed me nor any of my friends who have hired him too, he can help you with any of the following hacks:
ReplyDelete-Phone hacks (remotely)
-Credit repair
-Bitcoin recovery (any cryptocurrency)
-Make money from home (USA only)
-Social media hacks
-Website hacks
-Erase criminal records (USA & Canada only)
-Grade change
-funds recovery
Email: onlineghosthacker247@ gmail .com